Enhance strength, stability and wellbeing with proper push-up technique.

Introduction
Push-ups are a fundamental exercise that can significantly contribute to your strength and overall fitness. By mastering proper form, you can maximise the benefits and prevent potential injuries – both in yoga and in traditional exercise programs.
In yoga, the precise alignment and engagement required in Chaturanga Dandasana, or four-limbed staff pose, symbolise the focused determination and discipline essential to yoga practice. This parallels the philosophical notion of “tapas”, the fiery focus and self-control that leads to transformation and spiritual growth.
Whether you are a beginner or at an advanced level, understanding the nuances of performing a push-up/four limbed staff pose correctly is essential. From engaging the right muscles to avoiding common mistakes, let’s delve into the proper technique for traditional chest & shoulder push-ups, tricep push-ups and Chaturanga to ensure you gain the most from this versatile exercise 🙂
Benefits of Push-Ups
- Muscular endurance: A functional exercise, push-ups train a combination of muscles, building endurance.
- Upper body definition: Strengthens then multiple muscle groups including the chest, shoulders and arms.
- Core Stability: Engages the core muscles, including the back and abdominals, improving overall stability and posture.
- Convenience: Push-ups can be done anywhere, without the need for special equipment.
- Scalability: They can be modified to suit different fitness levels, from beginner to advanced.
- Overall health and fitness: Regular practice not only builds physical strength, but also boosts overall wellbeing through aiding weight loss and developing confidence.

How to do a perfect chest & shoulder push-up
Follow the steps below or have a look at our detailed video for proper technique so you can make the most of this do-anywhere, multi-beneficial exercise! There is also a separate video showing technique for tricep push-ups, which we’ll look at later in this article.
Level 1/Beginner
If you have wrist issues or need to build up strength gradually, a wall or incline push-up could be a great option.

Alternatively, follow the steps below.
Starting Position
- Come to an all-fours position. Position your hands slightly wider than shoulder-width apart, in line with the centre of the chest rather than the shoulders. This ensures you engage the pectorals and use the shoulder muscles more for stabilisation.
- Turn fingers to 12 o’ clock to safely align the wrist, elbow and shoulder. NOTE: Adjust the finger position slightly inward if doing so allows better alignment for you.
- Lengthen the neck and spine toward a neutral spine and engage the abdominals.
- Keep your toes on the floor to ensure a stable position where the kneecap is not grinding into the floor so you can focus on isolating the arms and chest.
- Subtly protract the shoulder blades and hug the shoulder blades onto the back, thus activating both the pushing and pulling muscles **.
Execution
- As a strong unit, lower the chest to elbow level. If you can’t quite reach a 90-degree angle (wrist-elbow-shoulder), that’s OK!
- At the base, the shoulders align with or are slightly forward of the fingertips.
- Push through the palms of your hands, driving the hands into the floor to lift back up.
- Straighten your arms without locking the elbow joint.
Level 2
- To advance, maintain the same technique as before, but extend the hips by moving the hands forward or knees back to create a diagonal line from the knees toward the crown of the head, keeping a neutral spine with the neck as an extension of the spine.
- Avoid dropping or lifting the hips.
- Engage the abdominals, squeeze the glutes and keep the toes on the floor.
- As a strong unit, lower the chest to elbow level and drive your hands into the floor to lift back up, straightening the arms without locking the elbow joint.
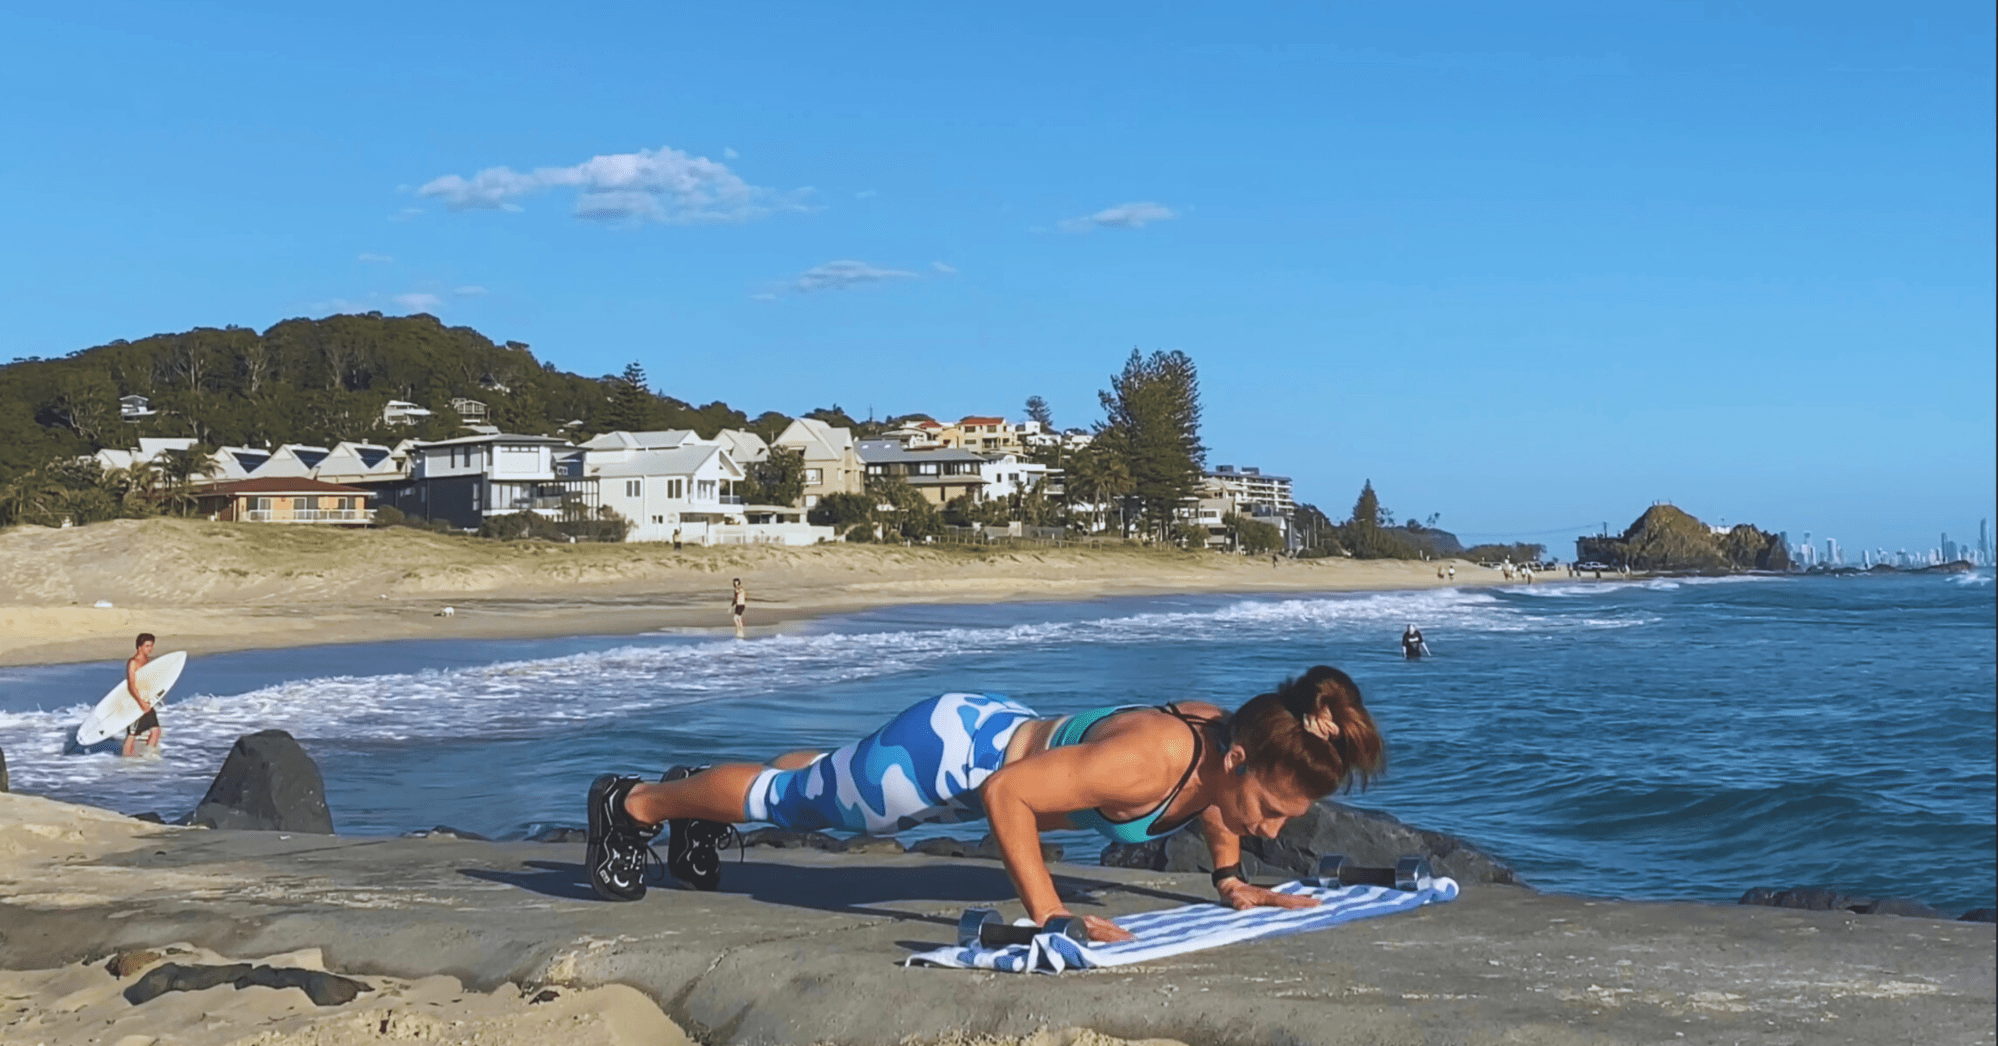
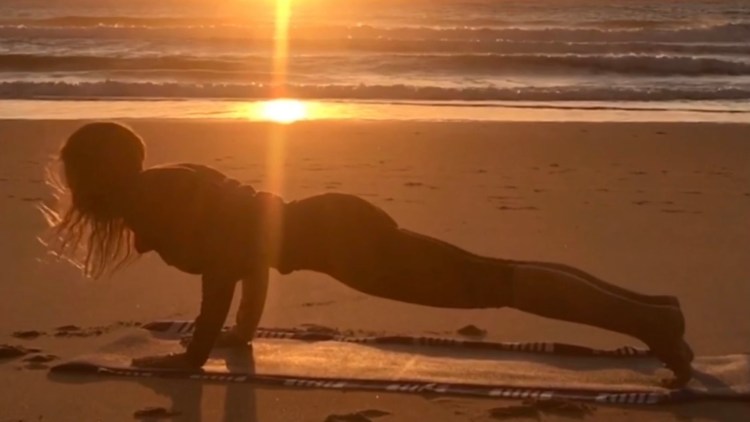
Level 3 – on your toes
- To advance, maintain the same technique as before, but lift the knees to create a diagonal line from the heels toward the crown of the head, keeping a neutral spine with the neck as an extension of the spine.
- Avoid dropping or lifting the hips.
- Engage the abdominals, press back into the heels, squeeze the glutes and lift the kneecaps upward to ensure the legs are strong & supporting muscles are engaged.
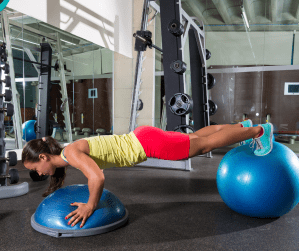
There are several additional ways to progress a push-up, such as by enlisting your kids :-), placing your feet on a raised surface, placing your hands on a Bosu ball for a stability challenge, or combining this by placing your feet on a Pilates ball.


How to do a perfect tricep push-up

Level 1/Beginner
Starting Position
- Come to an all-fours position with the arms straight, hands underneath the shoulders, knees bent and knees in line with the hips.
- Turn your fingers to 12 o’ clock and align the fingertips with the tops of the shoulders.
- Point the elbows straight backward toward your feet.
- Subtly protract the shoulder blades and hug the shoulder blades onto the back, thus activating both the pushing and pulling muscles**.
- Lengthen the neck and spine toward a neutral spine and engage the abdominals.
** “Use a mental image of the triceps, pectoralis major and serratus anterior muscles engaging in stabilising the arms, shoulders, and chest… The triceps straighten the elbows and is a secondary stabiliser of the shoulder joint. The pectoralis major draws the upper arm toward the midline (adduction) and helps to expand the chest (when the shoulders are held in place).
The serratus anterior extends from the upper nine ribs to the inner (anterior) medial surface of the scapula. It acts in concert with the rhomboids to stabilize the shoulder blades and thus prevent ‘winging‘ of the scapula in this pose”.
– Ray Long
Execution
- Shift the body forward in space. With the body as one unit, lower the chest to elbow level.
- At the base, ensure (up to) a 90-degree angle from the wrist through the elbow to the shoulder, keeping the fingertips aligned with the top of the shoulders.
- Keep your toes on the floor to ensure a stable position where the kneecap is not grinding into the floor, so you can focus on isolating the arms.
- Drive your hands into the floor to push back up, straightening the arms without locking the elbow joint.
- Breathing: Inhale down, exhale on exertion as you push up.
Level 2
- To advance from level 1, maintain the same technique as before, but extend the hips to create a diagonal line from the knees toward the crown of the head, keeping a neutral spine with the neck as an extension of the spine. Avoid dropping or lifting the hips.
- Engage the abdominals, squeeze the glutes and keep the toes on the floor.
- Lower the chest to elbow level and drive your hands into the floor to lift back up, straightening the arms without locking the elbow joint.
- Breathing: Inhale down, exhale on exertion as you push up.
Level 3
- To advance from level 2, maintain the same technique as before, but lift the knees to create a diagonal line from the heels toward the crown of the head, keeping a neutral spine with the neck as an extension of the spine. Avoid dropping or lifting the hips.
- Engage the abdominals, press back into the heels, squeeze the glutes and lift the kneecaps upward to ensure the legs are strong & supporting muscles are engaged.
- Lower the chest to elbow level and drive your hands into the floor to lift back up, straightening the arms without locking the elbow joint.
- Breathing: Inhale down, exhale on exertion as you push up.
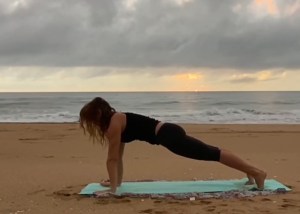
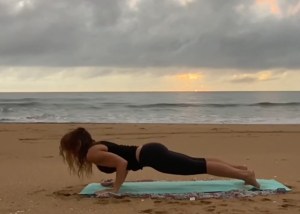
Chaturanga Dandasana
In yoga, Chaturanga, also known as four-limbed staff pose, requires precise technique to avoid strain and ensure maximum benefits. Importantly, it is crucial to check in with your body and get to know your limits. My first shoulder injury resulted from repeatedly performing chaturanga by lowering my shoulders beyond 90 degrees at the elbow. There’s a fine balance between effort and ease – see the section on Metaphysical connection below.
Technique
- Start from a high plank position with the hands placed directly under the shoulders, engaging the core and maintaining a line from head to heels.
- Spread your fingers and press into the finger mounds and all corners of the palms.
- Press the floor away from you, maintaining a strong core and engaging the legs to support the body.
- To modify, bring the knees to the floor before flexing the elbows. Knees, Chest and Chin pose (Astanga Namaskara) is a great alternative.
- Before you lower down, shift your weight forward in space so the shoulders move forward past the wrists.
- Bend your elbows and point them straight back – the elbows only hinge. Aim toward a 90-degree angle, with the shoulders no lower than the elbows. Less is fine! Work with your body.
- Breathing: When performing this pose as part of a slow flow, inhale in plank as you shift the weight forward, exhale to lower (on exertion) and inhale into cobra, as the lungs open.
This challenging pose builds upper body strength and endurance when executed with proper alignment and control. Video here.
“The trapezius and rhomboid muscles pull the shoulder blades back toward the spine. These muscles protect the fronts of the shoulders from injury by holding the shoulder blades onto the back when we exert force through the arms. The serratus anterior muscles attach to the sides of the ribs and connect underneath the shoulder blades. When contracted, these muscles pull your shoulder blades forward and round your upper back.”
– Doug Keller

Metaphysical connection

Four-limbed staff pose holds significant metaphysical and philosophical connections in the practice of yoga. This foundational posture requires strength, stability, and mental focus, embodying the core principles of yoga philosophy.
Metaphysically, Chaturanga represents the balance of opposing forces within the body and mind. It demands a harmonious alignment of strength and focused form, mirroring the concept of finding equilibrium between effort and ease, known as “sthira” (to stand firm – stability, intent, and strength) and “sukha” (good space – comfort, ease and openness) in yoga philosophy.
Philosophically, Chaturanga can be viewed as a metaphor for the interconnectedness of mind, body, and spirit. As practitioners engage their physical body in the pose, they are also encouraged to cultivate awareness of their breath and mental state. This integration of physical, mental and spiritual elements reflects the holistic approach of yoga philosophy, aiming to unite all aspects of the self. The pose opens Manipura, the solar plexus chakra, which is associated with inner confidence and personal power.
Furthermore, the precise alignment and engagement required in Chaturanga symbolise the focused determination and discipline essential to yoga practice. This parallels the philosophical notion of “tapas,” the fiery discipline and self-control that leads to transformation and spiritual growth.
In essence, Chaturanga serves as a tangible manifestation of the metaphysical and philosophical principles embedded in the practice of yoga, inviting practitioners to explore the interconnectedness of their physical, mental and spiritual being.
Common Mistakes to Avoid
- Allowing the lower back to sag.
- Allowing the hips to hike up.
- Dropping the head.
- Flaring out the elbows.
- Hugging the elbows in too close to the waist (they should point straight backward).
- Not engaging the core.
Practice proper push-up technique to maximise the benefits and avoid potential injury!

Conclusion
Mastering the art of push-ups is a valuable asset to any fitness routine, offering a multitude of benefits for individuals at all levels. By focusing on perfecting the form and technique as outlined in this comprehensive guide, you can enhance muscular endurance, achieve upper body definition, improve core stability, and enhance overall health and fitness. Remember to avoid common mistakes and always consult a physician before starting any new exercise program. Whether you are a beginner or an advanced practitioner, integrating proper push-up technique into your fitness regimen can lead to long-term strength gains and enhanced well-being. For further insights, the additional resources provided can offer valuable supplementary information and techniques for refining your push-up practice.
Safety notice
Please consult your physician before commencing any exercise program or yoga practice. This article and the video links therein are not intended as a substitute for medical advice, diagnosis or treatment. You agree that by following the advice and participating in the exercises demonstrated there is the possibility of injury, and you assume the risk and responsibility for this.
Resources
If you’d like to explore more on the topic, here are some additional resources:
- Hernandez, A., Three ways to do better push-ups.
- Hogan, E., Experts confront myths about knee push-ups.
- Keller, D. So Long, Sore Shoulders!
- Long, R. “Easing in” to Chaturanga Dandasana
- Schultz, R. How to do a triceps push-up the right way.

