Discovering the Power of Pilates: A Journey to Longevity and Vitality

From Fitness Frustration to Pilates Revelation: A Journey to Balance and Strength

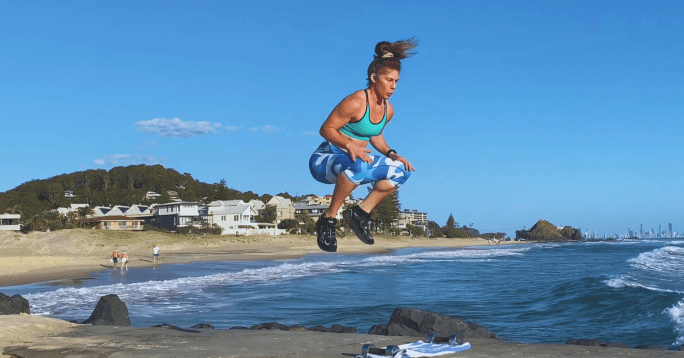
Do you have a favourite type of exercise? For many years, it’s been a race for me to maintain a fitness routine that balances cardio and strength training. That is, until injury kicked in. I’ve hurt my hip flexors riding too many miles on the bike, my back with lifting weights that were too heavy, and my shoulders with yoga (too many low chaturangas)… Who would have thought!

Since every single person’s body is made uniquely, all we need is a shift in perception: Remember to scrupulously maintain focused self-awareness to steer clear of injury in any activity.

After trial and error, I found that, when combined with a healthy dose of cardio, strength and mindfulness, Pilates offers a pathway to balance, strength and injury prevention for long-term sustainability and longevity. This enduring practice not only empowers us physically but also cultivates unwavering focus and resilience. Let’s look at the benefits.

The Transformative Benefits of Pilates

Pilates is not just about physical exertion; it’s a holistic practice that cultivates several benefits. From enhancing balance and core strength to improving glute strength, coordination and proprioception, Pilates engages the body in ways that traditional workouts often overlook. Moreover, it emphasises the importance of proper breathing, alignment and posture, fostering a mind-body connection that is essential for overall wellbeing.

By committing to a regular Pilates practice, you can expect a substantial improvement in wellbeing:

  • Balance: Enhanced stability and equilibrium.
  • Core Strength: A reinforced and resilient core.
  • Glute Strength: Strengthened gluteal muscles – key to support your back too!
  • Coordination: Improved physical harmony and synchronisation.
  • Proprioception: Heightened awareness of body position.
  • Breathing: Focused and controlled respiration.
  • Alignment: Improved postural balance and placement – protect your knees and hips.
  • Increased energy and a better mood! Keep your spouse happy… 🙂
Ascension Active instructors doing a seven-minute stretch on the beach at sunrise

Unlocking the Power of Pilates

Further Evidence and Insights

  1. Scientific evidence supports the effectiveness of Pilates for improving physical fitness and reducing the risk of injuries. Studies have shown that regular Pilates practice can lead to significant improvements in muscle endurance, flexibility and overall body composition (Segal et al., 2019).
  2. Pilates has been found to be particularly beneficial for individuals with chronic musculoskeletal conditions such as low back pain and osteoporosis. Its emphasis on core stability and controlled movements can help alleviate symptoms and improve functional capacity (Lim et al., 2020).
  3. Unlike high-impact exercises, Pilates is gentle on the joints, making it suitable for individuals of all ages and fitness levels. Its low-impact nature reduces the risk of strain and injury, allowing for consistent participation and long-term adherence to an exercise regimen.

Pilates: a new perspective

Let the good times roll

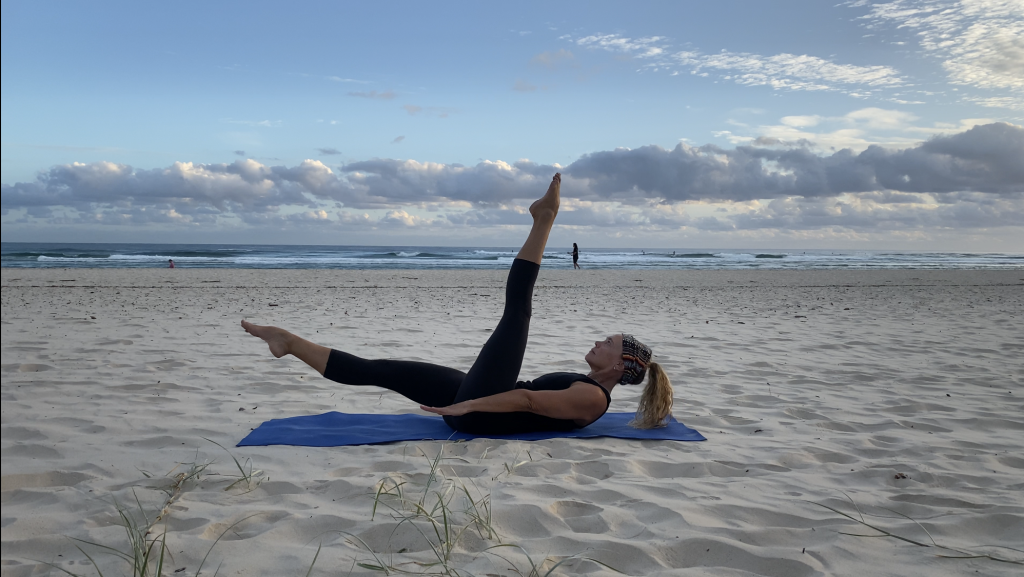
In earlier years, the practice of Pilates may have seemed quite regimented, with its German origins (invented by Joseph Hubertus Pilates). However, seemingly innocuous movements like the “hundred” serve to condition the core, strengthen smaller muscle groups and foster balance. I enjoyed this blog post reminding us of the original 34 exercises. (I love the roll up! And the roll over. And rolling like a ball… let the good times roll!). Here is a short video with all that rock & roll for you to get started!

Pilates need never be dull or monotonous. By incorporating diverse equipment, uplifting music and cultivating the right environment, Pilates sessions can be fresh, invigorating and enjoyable.

Ascension Active instructor doing Pilates series of five on the beach
Pilates Series of Five

How can you get into it?

Take the First Step

For those intrigued by the prospect of Pilates but unsure of where to begin, a wealth of resources awaits. From instructional videos to guided sessions, platforms like YouTube offer a variety of free Pilates content to facilitate a smooth transition into this enriching practice.

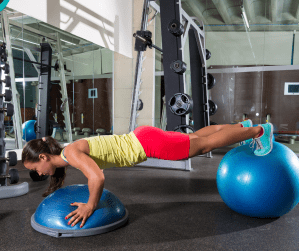
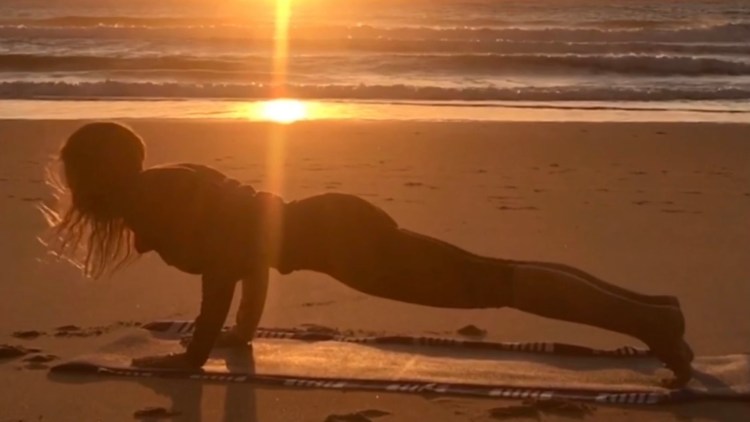
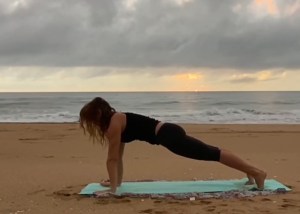
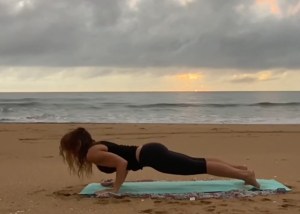
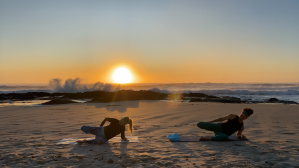
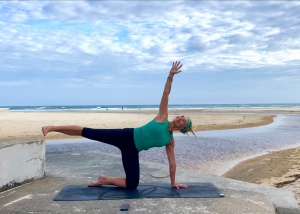
Ascension Active’s routines can be done with no equipment, or try sessions with a mini ball, booty band, long resistance band or magic circle. Our sessions follow the beat of the music, and they are on the beach, so you’ll always have a great view! What’s more, they are free and can be done anywhere, anytime.

Ready to experience the transformative power of Pilates for yourself? Take the first step by signing up for a beginner’s class at your local studio or try our ten-minute Pilates series – no equipment needed. Your journey to improved strength, balance, and overall wellbeing begins today.

Practical Tips

Here are some practical tips for incorporating Pilates into a daily routine:

  1. Set aside dedicated time: Schedule Pilates sessions into your daily or weekly calendar just like any other appointment. Consistency is key to seeing results.
  2. Start with short sessions: If you’re new to Pilates or short on time, begin with shorter sessions, such as 10-15 minutes, and gradually increase the duration as you build strength and endurance.
  3. Choose a convenient time: Select a time of day when you’re most likely to stick to your Pilates routine. Whether it’s in the morning before work, during your lunch break, or in the evening after dinner, find a time that works best for you.
  4. Create a dedicated space: Designate a specific area in your home where you can comfortably practice Pilates. Keep your mat and any necessary equipment nearby to eliminate barriers to starting your session.
  5. Mix it up: Explore different Pilates routines and exercises to keep your practice varied and engaging. Incorporate mat Pilates, reformer Pilates, and other equipment-based workouts to challenge your body in new ways.
  6. Combine Pilates with other activities: Integrate Pilates into your existing fitness routine by combining it with other activities such as yoga, cardio workouts or strength training. This can help you achieve a well-rounded fitness regimen.
  7. Listen to your body: Pay attention to how your body feels during Pilates sessions and adjust the intensity or duration as needed. It’s important to honour your body’s limits and avoid pushing yourself too hard, especially if you’re recovering from an injury or dealing with any discomfort.
  8. Stay motivated: Find motivation to stick to your Pilates routine by setting specific goals, tracking your progress, and celebrating your achievements along the way. Consider joining a Pilates class, participating in challenges, or connecting with a workout buddy for added accountability.
  9. Practise mindfulness: Use Pilates as an opportunity to practise mindfulness and connect with your body. Focus on your breath, engage your muscles mindfully, and stay present throughout your practice to maximise the benefits of each session.
  10. Make it enjoyable: Experiment with different Pilates styles, instructors, music playlists, and settings to make your practice enjoyable and something you look forward to each day.

By incorporating these practical tips into your daily routine, you can make Pilates a regular and rewarding part of your lifestyle that supports your overall health and wellbeing.

Ascension Editing Instructor Annie doing side plank balancing on one knee and one hand at the beach.
Balancing Knee Side Plank

Conclusion

In conclusion, Pilates stands out as a versatile and effective form of exercise that offers benefits for both the body and mind. By incorporating Pilates into your fitness routine, you not only enhance your physical strength and resilience but also cultivate a deeper sense of balance, focus and holistic wellbeing.

Make Pilates your comprehensive ally; an indispensable part of your exercise toolkit aimed at preserving strength, fostering balance, and promoting injury-free progress at any stage of life. By incorporating Pilates into your fitness routine, you’re not just exercising; you’re investing in your long-term health and vitality. So, why wait? Take the plunge; start your Pilates journey today and unlock the potential within!

Disclaimer

Before beginning any new exercise program, it is important to consult with a healthcare professional, particularly if you have any underlying health concerns or medical conditions.

References


The ultimate guide to burpees for fitness

The Ultimate Guide to Burpees for Full-body Fitness

Catharina Smit demonstrates burpees, 2022

Burpees, love it or hate it, offer a multitude of benefits. A full-body exercise, they can provide several fitness benefits, but their effectiveness rides on proper technique and effective execution. Recent research* has confirmed that burpees are a versatile cardiovascular and strength exercise that can be adapted to various fitness levels. In this comprehensive guide, we will explore the fitness benefits, precautions, common mistakes, modifications, progressions, interesting variations, and tips for staying motivated when doing burpees.

Our short video will take you through every step along the way, and here is a little snapshot!

Benefits of Burpees

Burpees offer a wide range of fitness benefits, including:

  • Cardiovascular Endurance: Burpees elevate the heart rate quickly, effectively increasing cardio fitness for a stronger heart and lungs.
  • Brain Function: Improves blood flow to the brain for an alert mind.          
  • Strength: By engaging multiple muscle groups, including the chest, arms, core, glutes and legs, burpees build lean muscle strength and endurance in both your lower and upper body.
  • Calorie Burn: A high-intensity exercise, burpees can help burn a significant number of calories in a short period. They also speed up your metabolism, leading to increased calorie burn throughout the day.
  • Coordination: The combination of movements in burpees—such as jumping, squatting, and push-ups—helps improve coordination and body awareness.
  • Power: Burpees require explosive movements, which contribute to increased power output. This can be beneficial for athletic performance and everyday activities.
  • Mobility and Flexibility: Improves mobility and flexibility by moving multiple joints, flexing and extending the ankles, knees, hips and shoulders.
  • Portability: Performing burpees requires no equipment and minimal space. It’s free… and you can take this functional exercise anywhere!

Technique

To perform a burpee, follow these steps:

  • Stand with your back and neck in neutral, shoulders back, feet just wider than hip-width apart and toes turned out slightly (around 15 degrees).
  • Squat with your knees behind and in line with the toes.
  • Place your hands on the floor in front of you, inside the line of the feet.
  • With your weight on your hands, brace the abdominals and kick your feet back to a plank (four-count burpee) or pushup position on your hands and toes.
  • In plank, ensure a diagonal line from head to heels, rather than drop or lift the hips (see our video and article on performing planks).
  • Jump your feet back to the starting position.
  • Leap up and land softly back into a squat.
  • From the squat, jump straight back to plank again.
1
2
3
4
5

Precautions and Common Mistakes

While burpees can be highly beneficial, they also carry the risk of injury if not performed correctly. Common mistakes to avoid include:

  • Allowing the lower back to arch during the push-up portion.
  • Landing heavily or with your feet/knees misaligned, which can lead to joint strain.
  • Rounding the back during the squat-thrust position, which can strain the lower back.

To mitigate these risks, it’s important to maintain proper form and technique throughout the exercise and listen to the body’s signals to avoid overexertion.

Modifications and Progressions

Modifications

  • Step back and forward instead of jumping: For individuals with lower fitness levels or joint issues, stepping back into the plank and forward to a standing position, instead of jumping, can reduce impact. This is also a great place to start – building fitness takes time and commitment!
  • Elevated surface: Performing burpees with your hands placed on an elevated surface, such as a low wall or yoga blocks, can reduce the load on the upper body.

Alternatives

When a four-count burpee is included in a structured class format, there may be times when this is out of your reach. As an alternative, you can:

  • Squat with a hip extension
  • Simply perform squats (as shown in the video above).

Progressions & Interesting Variations

  • Adding a tuck jump: After returning to standing position, add a tuck jump to intensify the exercise.
  • Adding plank jacks: From a plank position, jack the feet in and out before jumping back to the starting position.
  • Adding frog jumps: From a plank position, jump the feet forward and back before leaping forward and up.
  • Spiderman burpees: Incorporate a knee-to-elbow movement during the plank phase.
  • Adding switch climbers: Similar to spiderman burpees, just jump both feet up from plank, with one knee approaching the opposite shoulder.
  • Surfer burpees: Instead of a vertical jump, add a side turn/broad jump into a wide squat. This adds challenge to the obliques and an element of proprioception.

Another option is to build up to a routine where combinations of these movements can be interspersed, for example, with side shuffles, running or long jumps.

Tuck Jump
Plank Jack
Switch Jump
Surfer

Research-Backed Versatility of Burpees

Let’s dive into the research-backed advantages. A March 2022 study published in the Journal of Strength and Conditioning Research investigated the effects of high-intensity functional training (HIFT) on cardiorespiratory and neuromuscular performance, as well as inflammatory and muscle damage markers. The research found that HIFT exercises like burpees can lead to significant improvements in both aerobic and anaerobic fitness when incorporated into a regular training routine.

The lack of a standardised burpee makes it challenging to conduct definitive research; however, burpee variations offer an element of fun that can aid interest and participation… a goal worth pursuing for the health and wellbeing of the community.

Tips for Staying Motivated

  • Set specific goals, such as increasing the number of burpees completed in a set time. It’s OK to rest! Proper form is paramount.
  • Incorporate burpees into a circuit training routine for variety.
  • Track, progress and celebrate milestones to stay motivated and engaged with the exercise.

In conclusion, burpees are a valuable addition to any fitness routine, offering a wide array of benefits when performed with proper form and technique. By understanding the precautions, modifications, progressions, interesting variations, and leveraging research findings, individuals can maximize the effectiveness of burpees as a versatile cardiovascular and strength exercise. Staying motivated and consistent with burpee workouts can lead to notable improvements in overall fitness and endurance.

Conclusion

A dynamic, functional and effective exercise, burpees offer a multitude of fitness benefits. By mastering proper technique, considering precautions, and exploring modifications and progressions, you can harness the power of burpees to ramp up your cardiovascular endurance, strength, mobility and coordination. Stay motivated and consistent, integrate burpees into your fitness routine and notice remarkable improvements in your overall health and fitness!

Further Information

Gist, Nicholas H., Freese, Eric C. And Cureton, Kirk J., Comparison of responses to two high-intensity intermittent exercise protocols, Metabolism and Body Composition Laboratory, Department of Kinesiology, University of Georgia, Athens, Georgia.

Kinet, J Hum, International Standards for the 3‐Minute Burpee Test: High‐ Intensity Motor Performance, National Institute of Health, National Library of Medicine, 2019 Oct; 69: 137–147.

Les Mills, Technique – How to Safely Do a Burpee?

* Posnakidis, Georgio1; Aphamis, George; Giannaki, Christoforos D.; Mougios, Vassilis; Aristotelous, Panagiotis; Samoutis, George; Bogdanis, Gregory C. High-Intensity Functional Training Improves Cardiorespiratory Fitness and Neuromuscular Performance Without Inflammation or Muscle Damage, The Journal of Strength and Conditioning Research, March 2022.

Reed, K. PhD, How Many Calories Do Burpees Burn and How Many You Should Be Doing, Positive Health Wellness, September 2016.

Disclaimer

Please consult your physician before commencing any exercise program. The advice and video in this article are not intended as a substitute for medical advice, diagnosis or treatment. You agree that by participating in the exercises demonstrated there is the possibility of injury, and you assume the risk and responsibility for this.

Mastering push-up form for maximum benefits

Enhance strength, stability and wellbeing with proper push-up technique.


Introduction

Push-ups are a fundamental exercise that can significantly contribute to your strength and overall fitness. By mastering proper form, you can maximise the benefits and prevent potential injuries – both in yoga and in traditional exercise programs.

In yoga, the precise alignment and engagement required in Chaturanga Dandasana, or four-limbed staff pose, symbolise the focused determination and discipline essential to yoga practice. This parallels the philosophical notion of “tapas”, the fiery focus and self-control that leads to transformation and spiritual growth.

Whether you are a beginner or at an advanced level, understanding the nuances of performing a push-up/four limbed staff pose correctly is essential. From engaging the right muscles to avoiding common mistakes, let’s delve into the proper technique for traditional chest & shoulder push-ups, tricep push-ups and Chaturanga to ensure you gain the most from this versatile exercise 🙂

Benefits of Push-Ups

  • Muscular endurance: A functional exercise, push-ups train a combination of muscles, building endurance.
  • Upper body definition: Strengthens then multiple muscle groups including the chest, shoulders and arms.
  • Core Stability: Engages the core muscles, including the back and abdominals, improving overall stability and posture.
  • Convenience: Push-ups can be done anywhere, without the need for special equipment.
  • Scalability: They can be modified to suit different fitness levels, from beginner to advanced.
  • Overall health and fitness: Regular practice not only builds physical strength, but also boosts overall wellbeing through aiding weight loss and developing confidence.

How to do a perfect chest & shoulder push-up

Follow the steps below or have a look at our detailed video for proper technique so you can make the most of this do-anywhere, multi-beneficial exercise! There is also a separate video showing technique for tricep push-ups, which we’ll look at later in this article.

Level 1/Beginner

If you have wrist issues or need to build up strength gradually, a wall or incline push-up could be a great option.

Alternatively, follow the steps below.

Starting Position
  1. Come to an all-fours position. Position your hands slightly wider than shoulder-width apart, in line with the centre of the chest rather than the shoulders. This ensures you engage the pectorals and use the shoulder muscles more for stabilisation.
  2. Turn fingers to 12 o’ clock to safely align the wrist, elbow and shoulder. NOTE: Adjust the finger position slightly inward if doing so allows better alignment for you.
  3. Lengthen the neck and spine toward a neutral spine and engage the abdominals.
  4. Keep your toes on the floor to ensure a stable position where the kneecap is not grinding into the floor so you can focus on isolating the arms and chest.
  5. Subtly protract the shoulder blades and hug the shoulder blades onto the back, thus activating both the pushing and pulling muscles **.
Execution
  1. As a strong unit, lower the chest to elbow level. If you can’t quite reach a 90-degree angle (wrist-elbow-shoulder), that’s OK!
  2. At the base, the shoulders align with or are slightly forward of the fingertips.
  3. Push through the palms of your hands, driving the hands into the floor to lift back up.
  4. Straighten your arms without locking the elbow joint.

Level 2

  1. To advance, maintain the same technique as before, but extend the hips by moving the hands forward or knees back to create a diagonal line from the knees toward the crown of the head, keeping a neutral spine with the neck as an extension of the spine.
  2. Avoid dropping or lifting the hips.
  3. Engage the abdominals, squeeze the glutes and keep the toes on the floor.
  4. As a strong unit, lower the chest to elbow level and drive your hands into the floor to lift back up, straightening the arms without locking the elbow joint.

Level 3 – on your toes

  1. To advance, maintain the same technique as before, but lift the knees to create a diagonal line from the heels toward the crown of the head, keeping a neutral spine with the neck as an extension of the spine.
  2. Avoid dropping or lifting the hips.
  3. Engage the abdominals, press back into the heels, squeeze the glutes and lift the kneecaps upward to ensure the legs are strong & supporting muscles are engaged.

There are several additional ways to progress a push-up, such as by enlisting your kids :-), placing your feet on a raised surface, placing your hands on a Bosu ball for a stability challenge, or combining this by placing your feet on a Pilates ball.


How to do a perfect tricep push-up

Level 1/Beginner

Starting Position
  1. Come to an all-fours position with the arms straight, hands underneath the shoulders, knees bent and knees in line with the hips.
  2. Turn your fingers to 12 o’ clock and align the fingertips with the tops of the shoulders.
  3. Point the elbows straight backward toward your feet.
  4. Subtly protract the shoulder blades and hug the shoulder blades onto the back, thus activating both the pushing and pulling muscles**.
  5. Lengthen the neck and spine toward a neutral spine and engage the abdominals.

** “Use a mental image of the triceps, pectoralis major and serratus anterior muscles engaging in stabilising the arms, shoulders, and chest… The triceps straighten the elbows and is a secondary stabiliser of the shoulder joint. The pectoralis major draws the upper arm toward the midline (adduction) and helps to expand the chest (when the shoulders are held in place).

The serratus anterior extends from the upper nine ribs to the inner (anterior) medial surface of the scapula. It acts in concert with the rhomboids to stabilize the shoulder blades and thus prevent winging of the scapula in this pose”.

– Ray Long

Execution
  1. Shift the body forward in space. With the body as one unit, lower the chest to elbow level.
  2. At the base, ensure (up to) a 90-degree angle from the wrist through the elbow to the shoulder, keeping the fingertips aligned with the top of the shoulders.
  3. Keep your toes on the floor to ensure a stable position where the kneecap is not grinding into the floor, so you can focus on isolating the arms.
  4. Drive your hands into the floor to push back up, straightening the arms without locking the elbow joint.
  5. Breathing: Inhale down, exhale on exertion as you push up.

Level 2

  • To advance from level 1, maintain the same technique as before, but extend the hips to create a diagonal line from the knees toward the crown of the head, keeping a neutral spine with the neck as an extension of the spine. Avoid dropping or lifting the hips.
  • Engage the abdominals, squeeze the glutes and keep the toes on the floor.
  • Lower the chest to elbow level and drive your hands into the floor to lift back up, straightening the arms without locking the elbow joint.
  • Breathing: Inhale down, exhale on exertion as you push up.

Level 3

  1. To advance from level 2, maintain the same technique as before, but lift the knees to create a diagonal line from the heels toward the crown of the head, keeping a neutral spine with the neck as an extension of the spine. Avoid dropping or lifting the hips.
  2. Engage the abdominals, press back into the heels, squeeze the glutes and lift the kneecaps upward to ensure the legs are strong & supporting muscles are engaged.
  3. Lower the chest to elbow level and drive your hands into the floor to lift back up, straightening the arms without locking the elbow joint.
  4. Breathing: Inhale down, exhale on exertion as you push up.

Chaturanga Dandasana

Screenshot

In yoga, Chaturanga, also known as four-limbed staff pose, requires precise technique to avoid strain and ensure maximum benefits. Importantly, it is crucial to check in with your body and get to know your limits. My first shoulder injury resulted from repeatedly performing chaturanga by lowering my shoulders beyond 90 degrees at the elbow. There’s a fine balance between effort and ease – see the section on Metaphysical connection below.

Technique

  • Start from a high plank position with the hands placed directly under the shoulders, engaging the core and maintaining a line from head to heels.
  • Spread your fingers and press into the finger mounds and all corners of the palms.
  • Press the floor away from you, maintaining a strong core and engaging the legs to support the body.
  • To modify, bring the knees to the floor before flexing the elbows. Knees, Chest and Chin pose (Astanga Namaskara) is a great alternative.
  • Before you lower down, shift your weight forward in space so the shoulders move forward past the wrists.
  • Bend your elbows and point them straight back – the elbows only hinge. Aim toward a 90-degree angle, with the shoulders no lower than the elbows. Less is fine! Work with your body.
  • Breathing: When performing this pose as part of a slow flow, inhale in plank as you shift the weight forward, exhale to lower (on exertion) and inhale into cobra, as the lungs open.

This challenging pose builds upper body strength and endurance when executed with proper alignment and control. Video here.

The trapezius and rhomboid muscles pull the shoulder blades back toward the spine. These muscles protect the fronts of the shoulders from injury by holding the shoulder blades onto the back when we exert force through the arms. The serratus anterior muscles attach to the sides of the ribs and connect underneath the shoulder blades. When contracted, these muscles pull your shoulder blades forward and round your upper back.

– Doug Keller

Plank Pose (Kumbhakasana)
Four-limbed Staff Pose (Chaturanga Dandasana)
Knees, Chest, and Chin Pose (Ashtanga Namaskara)

Metaphysical connection

Four-limbed staff pose holds significant metaphysical and philosophical connections in the practice of yoga. This foundational posture requires strength, stability, and mental focus, embodying the core principles of yoga philosophy.

Metaphysically, Chaturanga represents the balance of opposing forces within the body and mind. It demands a harmonious alignment of strength and focused form, mirroring the concept of finding equilibrium between effort and ease, known as “sthira” (to stand firm – stability, intent, and strength) and “sukha” (good space – comfort, ease and openness) in yoga philosophy.

Philosophically, Chaturanga can be viewed as a metaphor for the interconnectedness of mind, body, and spirit. As practitioners engage their physical body in the pose, they are also encouraged to cultivate awareness of their breath and mental state. This integration of physical, mental and spiritual elements reflects the holistic approach of yoga philosophy, aiming to unite all aspects of the self. The pose opens Manipura, the solar plexus chakra, which is associated with inner confidence and personal power.

Furthermore, the precise alignment and engagement required in Chaturanga symbolise the focused determination and discipline essential to yoga practice. This parallels the philosophical notion of “tapas,” the fiery discipline and self-control that leads to transformation and spiritual growth.

In essence, Chaturanga serves as a tangible manifestation of the metaphysical and philosophical principles embedded in the practice of yoga, inviting practitioners to explore the interconnectedness of their physical, mental and spiritual being.


Common Mistakes to Avoid

  • Allowing the lower back to sag.
  • Allowing the hips to hike up.
  • Dropping the head.
  • Flaring out the elbows.
  • Hugging the elbows in too close to the waist (they should point straight backward).
  • Not engaging the core.

Practice proper push-up technique to maximise the benefits and avoid potential injury!

🧘


Conclusion

Mastering the art of push-ups is a valuable asset to any fitness routine, offering a multitude of benefits for individuals at all levels. By focusing on perfecting the form and technique as outlined in this comprehensive guide, you can enhance muscular endurance, achieve upper body definition, improve core stability, and enhance overall health and fitness. Remember to avoid common mistakes and always consult a physician before starting any new exercise program. Whether you are a beginner or an advanced practitioner, integrating proper push-up technique into your fitness regimen can lead to long-term strength gains and enhanced well-being. For further insights, the additional resources provided can offer valuable supplementary information and techniques for refining your push-up practice.

Safety notice

Please consult your physician before commencing any exercise program or yoga practice. This article and the video links therein are not intended as a substitute for medical advice, diagnosis or treatment. You agree that by following the advice and participating in the exercises demonstrated there is the possibility of injury, and you assume the risk and responsibility for this.

Resources

If you’d like to explore more on the topic, here are some additional resources:

Mastering side plank for core strength and balance

Perfect your side plank technique and unlock the benefits

Side plank demonstrated by Catharina Smit, 2022

Side plank is a powerful exercise that strengthens the core and challenges balance. Proper technique is imperative, and this article provides tips that will help you prevent injury and optimise results.

Plank pose is also a foundational pose in yoga with several variations that can enliven your practice. What’s more, yoga variations can spark your inner confidence while opening your heart.

Have a look at our video for a step-by-step guide.

Benefits

  • Strengthens the core, including the obliques, transverse abdominis and lower back muscles.
  • When done on the hand, side plank strengthens the supporting shoulder, arm and wrist.
  • Enhances focus and proprioception.
  • Improves balance and stability.
  • Enhances overall body awareness and mindfulness.
  • Aesthetically, trims the waist and promotes an overall toned appearance.

Technique

  1. Begin in a traditional plank position (see my previous post).
  2. Shift your weight onto your right hand and the outer edge of your right foot, stacking your left foot on top of the right.
  3. Brace the core by engaging the abdominal muscles.
  4. Align the right shoulder directly over the supporting hand. It’s crucial to pay careful attention to shoulder alignment, while consciously lifting up and out of the shoulder.
  5. Press the base of your fingers down to protect your wrists.
  6. Reach through your heels and flex your feet, creating a diagonal line from your heels to your head, without dropping or lifting the hips.
  7. Either keep the left hand on the hip or lift the arm towards the ceiling, opening the body to the left side while maintaining alignment from head to heels.
  8. Gaze forward or look upward to the top hand.
  9. Maintain strong activation of the core, legs and arms – this is a full body exercise!

Modifications

  • Knee down side plank: Start in an all-fours/tabletop position, then extend the top leg, place the top hand on the hip, and turn to face forward to come to side plank. This is called gate pose (Parighasana) in yoga. Having a bent knee on the floor or mat provides added support.
  • Balancing knee down side plank: From the previous position, lift the top leg. This is more challenging for balance and upper body strength.
  • Kickstand side plank: Bring the top foot toes to the floor in front, with the knee bent, to form a kickstand. Then extend the bottom leg.
  • Elbow side plank: Place one elbow directly under the shoulder, with the palm of the hand flat on the floor or mat. Turn to face forward. The knees can be bent and stacked, or the legs extended.
  • Top hand to hip: The top hand can rest on the hip, giving a lower center of gravity and making it easier to balance.
  • Staggered feet: Stagger the feet instead of stacking them to increase balance and support.

Progressions and variations

  • Top arm lift: Extend the top arm overhead to form a line from the heels to the fingertips.
  • Top arm thread the needle: Thread the top arm under the body and then back up towards the ceiling to increase core engagement.
  • Side crunch: Bring the top knee in and out.
  • Hip drop: Lift and drop the hips, keeping the hips stacked and aligned.
  • Top leg lift: Lift the top leg and extend the arm upward or overhead, creating a star shape with the body.

In yoga:

  1. Wild thing side bend: Come to three-legged dog with the front leg lifted, bend the lifted knee, bring your shoulders over the wrists, and place the toes on the floor behind you (with a side bend or backbend).
  2. Fallen triangle or rockstar: From three-legged dog, kick the lifted leg underneath the supporting leg, with the leg extended forward, foot down or lifted.
  3. Side plank with big toe hold: From a side plank with the right hand on the mat, bend the left knee, place the left fingers around the big toe and lift the left leg up to the sky. Hold the position for a few breaths.

Common mistakes

  • Dropping or sagging into the supporting shoulder can place strain on the fragile muscles supporting the shoulder joint. Lift up out of a strongly engaged shoulder. Note: don’t get a frozen shoulder, as I did! Only take side plank when you are rested and strong enough to focus on technique.
  • Dropping your hips toward the floor (unless doing the hip drop exercise) disengages the obliques and places more strain on the supporting shoulder, given the increased angle. Lift your hips up and engage your core to maintain a straight line from heels to head.

Safety Tips

  • Ensure the wrist, or elbow, is directly under the shoulder to prevent strain.
  • Lift strongly out of the supporting shoulder.
  • Engage the core muscles throughout.
  • Keep the hips stacked and aligned.
  • Keep the hips lifted so that there is a line from the heels through the hips to the shoulders.

Precautions

  • If any discomfort or pain arises, exit the position immediately.
  • Avoid side plank if you have an injury to the back, hips or ankles.
  • For shoulder and wrist injuries, either avoid the pose or perform it on the elbow.
  • Always check with your physician before practising side plank, especially if you have any medical condition or if you are pregnant.

Side plank in yoga: metaphysical connection

In yoga, the side plank is known as Vasisthasana. It not only builds physical strength but is also associated with the idea of embracing the qualities of the sage Vasistha: wisdom, balance, and spiritual illumination or clarity. Practising side plank can serve as a metaphor for finding stability and harmony amid life’s challenges, both on and off the mat.

Side plank opens the heart (anahata) and solar plexus (manipura) chakras. As such, it can serve to allow in kindness and compassion, while building confidence and focus. Think of being kind to yourself by building strength and balance and being kind to others by being strong for them.

Unlike in traditional exercise routines, in yoga, side plank is held for around five breaths.

Conclusion

Mastering side plank offers physical and mental rewards, from core strength and balance to mindfulness, focus and determination. It is essential to master the proper technique and consider modifications based on your skill level to prevent injuries. Understanding side plank progressions, variations, common mistakes, safety tips, and precautions will help you maximise the benefits while minimising the risk of potential discomfort or strain.

In the context of yoga, side plank nurtures physical wellbeing while fostering spiritual balance and clarity. The pose is a valuable addition to your practice, offering a holistic approach to fitness and wellness.

I hope this article helps you to get the most out of plank pose! In our next installment, we’ll look at the versatile push-up. See you on the mat.

Resources

If you’d like to learn more, check out these reputable publications:

The transformative power of plank pose

Strengthen your core, engage multiple muscle groups and boost overall fitness.

Plank is an excellent core-strengthening exercise that also engages the shoulders, arms and glutes. Moreover, as a full-body exercise, planking boosts metabolism, increasing overall calorie burn and assisting with weight management.

Metaphysically, plank builds willpower and determination. In yoga, the posture “draws a line of vibrant energy from the top of the head out through the feet and ignites the solar plexus” *, the seat of our confidence.

Get the best results from this exercise and avoid injuries by knowing how to perform, modify and progress plank with optimal technique.

“The difference between the impossible and the possible lies in a person’s determination.”

Tommy Lasorda

How to do a perfect plank

Plank demonstrated by Catharina Smit, Gold Coast, 2022

To perform, modify and progress a plank, check out our video or follow the steps outlined below.

  • Come to all fours kneeling.
  • Set the hands up directly under the shoulders and spread the fingers wide. Distribute the weight evenly through the fingertips and the base of the hand.
  • Actively engage the muscles of the arms and the upper back. With straight arms, press the mat away from you and draw the triceps in towards each other so that the elbows point backward.
  • Slightly protract the shoulder blades to support the shoulder joint, and draw the shoulders away from the ears, creating space for your neck.
  • Engage the core, pulling the navel in toward the spine.
  • Lift the knees off the mat and extend the legs.
  • Create length from the crown of the head through the tail to the heels. Draw the crown forwards while keeping the neck in neutral. Press back into the heels, engage the glutes and legs, and slightly tuck the pelvis to prevent sagging in the lower back.
  • Keep this core activation and maintain a spacious chest to take smooth, even breaths.
  • Hold the plank for as long as you can maintain proper form, aiming for at least 20-30 seconds to start.

How to modify plank


Plank modification demonstrated by Catharina Smit, Gold Coast, 2022

To modify plank:

  • Come to all fours kneeling.
  • Walk your hands forward to create a diagonal line from the knees to the shoulders.
  • Option 1: Align the hands directly underneath the shoulders. Remain on your knees and maintain alignment from the knees through the hips to the shoulders.
  • Option 2: Bend the elbows and set them up directly under the shoulders.
  • If it is more comfortable for you, bring the hands together and interlace the fingers.
  • Actively engage the muscles of the arms and the upper back. With your elbows, press the mat away from you.
  • Slightly protract the shoulder blades to support the shoulder joint, and draw the shoulders away from the ears, creating space for your neck.
  • Engage the core, pulling the navel in toward the spine.
  • Option 3: From an elbow plank, lift the knees off the mat and extend the legs.
  • Create length from the crown of the head through the tail to the heels. Engage the glutes, and slightly tuck the pelvis to prevent sagging in the lower back.
  • Maintain a spacious chest to take smooth, even breaths.

How to progress plank – advanced techniques & options


Advanced plank demonstrated by Catharina Smit, Gold Coast, 2022

Some ways to progress plank (elbow planks will be explored in the next installment):

  • From an elbow plank with the knees lifted, drop one knee at a time, keeping the hips and shoulders square.
  • Drop and lift both knees.
  • Drop the hips to one side and then the other, keeping the shoulders square.
  • Cross one foot over at a time.
  • Bring one knee to the same side elbow for a side climber, maintaining alignment from shoulders to heels.
  • Come to full plank on your hands, and take a slow mountain climber, bringing knees to chest.
  • Now take a slow cross climber, bringing knee to opposite shoulder.
  • Lift one leg at a time upward.
  • Drop the knees, sit back to child’s pose and rest.

Benefits of plank

The benefits of regularly incorporating planks into your workout routine include:

  1. Core strength: Planks target the entire core, including the transverse abdominis, rectus abdominis and obliques, leading to improved core strength and stability.
  2. Improved posture: Strengthening the core muscles through planks can help improve overall posture and reduce the risk of lower back pain.
  3. Muscular integrity and stability: Regularly practising planks can enhance overall stability and muscular integrity, as it engages multiple muscle groups simultaneously.
  4. Enhanced metabolism: As a full-body exercise, planking can contribute to a boosted metabolism, aiding in overall calorie burn and weight management.

Common mistakes when performing plank

When performing plank exercises, it’s crucial to be aware of common mistakes to ensure proper form and prevent potential injury. Here are some common mistakes to avoid:

  1. Dropping or raising the hips: One of the most common mistakes is allowing the hips to drop or raise, which can lead to improper engagement of the core muscles and increase the risk of lower back strain. Maintaining a straight line from the head to the heels is essential for effective execution.
  2. Sagging or rounding the back: Similarly, allowing the back to sag or round during a plank can lead to improper spinal alignment and diminished core activation. It’s important to maintain a neutral spine and engage the abdominal muscles to prevent any sagging or rounding. Overarching the lower back can place excessive strain on the lumbar spine and compromise the integrity of the exercise. Tucking the pelvis slightly and engaging the glutes can help prevent overarching and maintain proper spinal alignment.
  3. Incorrect hand placement: Placing the hands too far forward or backward can affect the alignment of the shoulders and wrists, potentially causing strain or discomfort in these areas. It’s essential to align the hands directly under the shoulders and distribute the weight evenly through the fingertips and the base of the hand.
  4. Neglecting core engagement: Failing to engage the core muscles properly during a plank can diminish the effectiveness of the exercise and place unnecessary stress on the lower back. Ensuring active core engagement by pulling the navel toward the spine is important for a successful plank.

Safety precautions for plank exercises

In addition to being mindful of common mistakes, consider these safety precautions when performing plank exercises:

  1. As always, consult with a healthcare professional: Before incorporating plank exercises into your fitness routine, it’s advisable to consult with a healthcare professional, particularly if you have any existing medical conditions or concerns.
  2. Maintain proper form: Focus on maintaining proper form throughout the exercise, paying attention to the alignment of the body and the engagement of the core and supporting muscles.
  3. Gradually increase duration and intensity: When starting out with plank exercises, it’s important to begin with shorter durations and gradually increase both the duration and intensity as your strength and endurance improve.
  4. Listen to your body: Pay attention to any discomfort or strain during plank exercises and adjust your positioning or take a break if needed. Pushing through pain or discomfort can increase the risk of injury.
  5. Explore modifications: If you experience challenges with traditional plank exercises, consider exploring modifications or alternative variations to suit your individual needs and abilities.

By being mindful of these common mistakes and following safety precautions, you can maximise the benefits of plank exercises while minimising the risk of injury. Remember to prioritise proper technique, gradual progression and attentive self-care throughout your fitness journey.

Conclusion

Incorporating planks into your fitness regimen can yield a multitude of benefits, from enhanced core strength and better posture to improved muscular integrity. As with any new exercise routine, it’s important to consult with a healthcare professional before beginning. By regularly practicing proper plank techniques and exploring variations, you can cultivate a stronger, more stable foundation for overall physical wellbeing. Remember, your health and safety always come first. Stay tuned for our next installment, where we delve into the intricacies of side planks.

DISCLAIMER: Please consult your physician before commencing any exercise program or yoga practice. The video cited in this article is not intended as a substitute for medical advice, diagnosis or treatment. You agree that by participating in the exercises demonstrated there is the possibility of injury, and you assume the risk and responsibility for this.

Resources

Here are some articles I found valuable:

* Ashworth, Kathryn, in Yoga International, How to Make the Most of your Plank Pose – https://yogainternational.com/article/view/plank-pose/

Keller, D, So Long, Sore Shoulders! https://www.doyoga.com/articles_all/11_march_08_rotators.pdf, 2008

Long, R, Preventing Yoga Injuries vs Preventing Yoga, Part II: Joint Hypermobility, http://www.dailybandha.com/search?q=shoulder, 2013.

Fine-tune your bridge pose in Mat Pilates and Yoga

Technique, alignment and benefits

Back in 2022, I wrote about the metaphysical and intuitive significance of “bridge” and the posture in yoga. This article explores the multifaceted benefits of integrating bridge pose into both Mat Pilates and yoga practices. Understand the nuances of this posture in both disciplines and learn how it can help build core strength, spinal stability, flexibility, and overall mind-body connection. Whether in a Pilates or yoga setting, this article provides a comprehensive approach to how bridge pose can improve your physical wellbeing and mental equilibrium.

What’s the difference?

There are some differences in how bridge is performed and what benefits it offers in yoga and Pilates. Here is a brief summary of the main differences.

If you want to learn more about the differences between bridge pose in Pilates and yoga, you can check out the references at the end of this article.

Bridge pose in Mat Pilates

In Pilates, bridge pose is known for its effectiveness in strengthening the core, stabilising the spine and improving overall flexibility. Almost every session in our Pilates series incorporates the wonderful bridge! Bridge pose in Pilates is similar to its counterpart in yoga, offering a variety of physical and mental benefits. To perform bridge pose in Pilates:

  1. Starting position: Lie on your back with your knees bent and feet flat on the floor, hip-width apart. Place your arms alongside your body with the palms facing down or take the arms away from the body at about 45 degrees and turn the palms upward to increase the challenge and keep an open chest.
  2. Alignment and muscular engagement: Inhale to prepare, and as you exhale, engage your glutes, pull in and up on the pelvic floor, and lift your tailbone, lower and middle back off the mat, so that your body weight rests on your feet, shoulders, neck and head. You can either articulate the spine bone by bone, or you can lift as a unit in a more dynamic way. Your body will form a straight line from your knees to your shoulders. Press through the heels to connect with your hamstrings. Press through the big toes to connect with the inner line of the leg and to assist with keeping the knees aligned with the hips. Keep your neck and shoulders relaxed while maintaining engagement of your glute and core muscles.
  3. Release: To release the pose, either lower your spine back down onto the mat, one vertebra at a time, or release the spine as one unit and hover above the mat before dynamically repeating the lift and lowering action.

Mat Pilates equipment for bridge pose

There are many ways to progress bridge pose in Mat Pilates. An excellent option is to use a booty band, mini ball band, long resistance band or magic circle. These videos include variations of bridge with props:

Benefits of bridge in Mat Pilates

  1. Core strengthening: Bridge pose in Pilates targets the deep core muscles, including the transverse abdominis and pelvic floor, which helps to improve core strength and stability.
  2. Spinal stability: By engaging the intrinsic muscles of the spine, bridge pose supports spinal stability, contributing to better posture and reduced risk of injury.
  3. Hip and glute activation: This pose effectively activates the glutes and hip muscles, promoting better hip stability, strength and stabilisation.
  4. Enhanced flexibility: Performing bridge pose regularly in Pilates can lead to increased flexibility in the spine and hip flexors, aiding in overall body flexibility.
  5. Mind-body connection: Similar to yoga, Pilates emphasises a mind-body connection, and bridge pose allows practitioners to focus on breath control and body awareness.

Incorporating bridge pose into your Pilates routine can contribute to improved core strength, flexibility and overall postural stability, making it a valuable addition to a comprehensive Pilates practice.

How to do bridge pose in yoga

Bridge pose, or Setu Bandha Sarvangasana in Sanskrit, is a rejuvenating yoga posture that offers many physical and mental benefits. To perform bridge pose, check out the 2024 video, revisit the images in my previous post and follow these steps:

  1. Starting position: Lie on your back with your knees bent and feet flat on the floor, hip-width apart. Let your arms rest alongside your body with palms facing down.
  2. Alignment and form: As you exhale, press your feet into the floor and peel your spine off the mat, vertebra by vertebra, starting from the tailbone, to lift your hips towards the ceiling. Keep your thighs parallel to each other. Relax and lengthen through the neck, with the shoulders away from the ears. Broaden through the collarbones to feel an open chest and breathe evenly. Focus on pressing through the heels to engage the glutes* and hamstrings, press through the big toes to engage the inner line of the leg, and tuck the pelvis slightly to feel an opening through the front of the hips. *Some yoga teachers advise against squeezing the glutes too hard, as this can create tension in the lower back and hamper the flow of energy. They suggest finding a balance between engaging the glutes and relaxing them, so that you can still feel a gentle stretch in the front of the hips.
  3. Hand position: Optionally, interlace your fingers on the mat, with the arms straight, and roll your shoulders underneath you so the shoulder blades are close together and the shoulders away from the ears.
  4. Hold and breathe: Hold the pose for around five deep, even breaths. Keep your gaze upward or keep the eyes closed and avoid turning your head from side to side.
  5. Release: To release the pose, gently unclasp your hands and slowly roll your spine back down onto the mat, vertebra by vertebra.

How to modify bridge pose in yoga

  • Raise the hips and place a block, small bolster or firm cushion underneath the lower back, then relax in a supported bridge. An option is to extend the legs and gently engage the abdominals to achieve a relaxed hip flexor stretch, being mindful of not overarching the spine.
  • It might be helpful to place a blanket underneath the shoulders and/or neck to avoid stress to the neck and upper spine.
  • Hands can be placed around the ankles for a supported sensation or position the hands to support the sacrum and initiate additional lift.
  • You could also place a block between the knees to practise alignment.

How to progress bridge pose in yoga

  • Once in bridge, raise one leg to the sky, with the knee bent or leg straight, keeping the hips aligned (remember to repeat this for the same duration on the other leg).
  • Raise both arms straight up to the sky, with the option to move the arms out to the sides and back up to challenge stability and control.
  • Progress to full wheel or upward bow pose. Bring the fingertips toward the shoulders. Then using the strength of the shoulders and arms, lift very lightly onto the crown of the head. Then press the upper body between the arms as we extend the arms and legs, lifting the hips toward the sky, and tucking the tailbone under ever so slightly so that we have a subtle lengthening of the lower back even as we extend the spine. To come out of the posture, flex the elbows, very lightly touch the crown of the mat to the head, tuck the chin, and slowly lower the back of the head, neck, shoulders, upper, middle and lower back toward the mat.
  • To advance this further, try extending one leg at a time up to the sky from upward bow, or – only under supervision and support from an experienced teacher – bend over backward from a standing position, first practising with your back to a wall, reaching overhead toward the wall.

Benefits of bridge pose in yoga

  1. Strengthens the back body: Bridge pose strengthens the back, gluteal muscles and hamstrings, helping to improve overall body strength and posture.
  2. Stimulates the thyroid: By pressing the throat against the chin, bridge pose helps to stimulate the thyroid gland, which can be beneficial for metabolism regulation.
  3. Relieves stress and mild depression: The gentle inversion of Bridge pose can help to calm the mind and alleviate symptoms of stress and mild depression.
  4. Stretches the chest, neck and spine: Bridge pose effectively stretches and opens the chest, back of the neck and spine, promoting flexibility and relieving tension in these areas.
  5. Therapeutic for Asthma: This pose can help to relieve symptoms of asthma by expanding the chest and improving breathing capacity.

Incorporating bridge pose into your regular yoga practice can offer several physical and mental benefits, making it a valuable addition to any routine.

See you on the mat!

Yoga videos

Pilates videos

Resources

Here are some books and articles I found valuable:

Surprise yourself

Ah… a brand-new year!

First: you are enough, just as you are. That’s it.

Yet as the seasons change – like a breath of crisp winter air, the scent of a summer breeze, the waxing moon and the shifting tides, we are reminded that the only constant in life is change.

Is there a change you would like to see in yourself? And if there is, can you take that step?

Absolutely! You have the power to change. And if it’s about your fitness, a new exercise routine – even a simple daily walk or swim – can help you start the year in a positive and healthy way. Take the challenge!

Find what you enjoy

Take an adventure by moving your body in a new way. Find what you enjoy, and you will want more. Soon, you will find joy in being active. Through challenge, you will create positive change and growth – both mentally and physically. Then reap the rewards of your efforts.

First things first: start small. Do what you can – five minutes of movement, or ten or thirty is enough to get you started.

Make a new habit

Below are five targeted workouts you can do in the privacy of your home, or in the garden or on a mountain. Do one session a week or do all five in one week. Just make a start. I promise, you will get fitter. You will feel better. Just remember it takes commitment to cultivate a new habit.

These sessions offer a balanced mix of cardio, strength, flexibility, tone and core stability. Together, they can help you achieve your fitness goals, and the best part is that they offer flexibility to fit into your schedule and fitness level. By committing to these workouts, you are on the path to feeling better and stronger. Check out the tips for overcoming common barriers to starting a new fitness routine at the end of this article.

As always, follow your doctor’s advice before starting a new exercise routine (disclaimer at the end of this post).

Without further ado, here are the workouts:

Tips for overcoming common barriers

1. Time Constraints

  • Make it a Priority: Schedule your workouts just like any other appointment. Treat it as non-negotiable time dedicated to your wellbeing.
  • Short Workouts: If time is an issue, opt for shorter workouts (such as these) or break longer workouts into smaller segments throughout the day.
  • Calendar Reminder: Set reminders on your calendar or phone to prompt you to exercise, making it harder to ignore.

2. Lack of Motivation

  • Find Your Why: Discover your personal reasons for wanting to be active and healthy. Whether it’s to feel more energised, reduce stress, or improve your overall wellbeing, having a strong “why” can fuel motivation.
  • Mix It Up: Try various types of exercise (such as Pilates or Yoga) to keep things interesting. From dance fitness to outdoor activities, finding something you enjoy can make it easier to stay motivated.
  • Accountability: Partner up with a friend or join a fitness group to keep each other motivated and accountable.

3. Prioritising Self-Care

  • Mindful Movement: Embrace the concept of “movement” rather than “exercise.” Incorporating activities you enjoy, such as dancing, hiking, or playing sports, can make staying active feel less like a chore and more like self-care.
  • Self-Compassion: Be kind to yourself on your fitness journey. Don’t dwell on missed workouts or setbacks; instead, focus on the progress you make and the positive habits you’re building.

4. Financial Constraints

  • Explore Free Options: Look for free workout resources online, such as YouTube channels (like Ascension Active) or apps offering no-cost exercise routines.
  • Minimal Equipment: Choose exercises that require minimal or no equipment, making it easier to start without a financial burden.

Remember, it’s all about taking that first step and staying consistent on your journey to a healthier lifestyle. Embrace the opportunity to surprise yourself and take charge of your well-being. Keep pushing forward, and you will see the results you are looking for.

Over the course of the year, I’ll be sharing informative articles to explain the benefits of different exercises, explore optimal technique, and dive deeper into yoga postures and philosophy.

Stay tuned!

DISCLAIMER

Please consult your physician before commencing any exercise program or yoga practice. The tips and recommendations in this post are not intended as a substitute for medical advice, diagnosis, or treatment. You agree that by participating in the exercises and following the tips in this post, there is the possibility of injury, and you assume the risk and responsibility for this.

Note: Tips for overcoming common barriers has been edited and verified based on a prompt to WordPress AI Assistant.

A very busy mind

This is probably your problem as much as mine.

I find myself consumed by ideas and fleeting projects. Sometimes these merge and magnify over time; like those bizarre dreams where all the particles of your day become pieces of a bigger, puzzling story…

Maybe you just find your mind unable to connect with a single moment.

Remember that meditation is not an unattainable extraction from reality.

Just sit for a bit, feel what you feel, think what you think… and then notice that you are sitting right there, thinking and feeling.

That is already enough.

Just me.

Back to my dilemma.

In the course of a busy mind and many ideas & half-attempted/sometimes top-gear projects, I contend with a restriction of personality where I am naturally shy/restrained/insular, depending on your point of view.

I would like to create stuff with other people, but I’m happiest in my bubble – with the occasional visit from a decent human or a cat – because they are really caring but entirely free & independent.

What a notion; I guess that’s why I’m drawn to ultra-confident “I am what I am” folk.

Next time.

But the video ideas, I believe, are meaningful… so many beautiful souls love yoga, get their physical healing from Pilates or overcome depression through vigorous exercise & a peer group (whether online or physical).

Given this, I’ve been making more videos, looking after day-to-day “real job” work, investing in family time and learning about caterpillars eating hibiscuses (hibisci?). (I have never been much of a gardener, but I know plants feel. Judge me then 😂. )

I’m sharing this in case it resonates with you on some level.

So there’s 5-minute yoga (sometimes that’s all we have) and 30-minute kickboxing (!). I know I need to get the voice level right, but I’m working on it, friends 😊

And the idea is to collaborate next time.

Because life is more fun when it’s shared.

Here’s to loving life!

Anahata

This post is about the heart chakra; inspired by the April WordPress prompt word “Green”. In Yoga philosphy, there is a model that depicts seven spinning wheels of light, energy and sound – the chakras. They are arranged from the base of the spine to the area just above the crown of the head. In the middle is the heart; the connection between the lower and higher chakras.

The root chakra is at the base of the spine, with the colour red, like lava, and the element earth. This is the seat of our most basic needs. We are grateful to feel safe, secure and at ease. We have enough of what we need to survive – clean water, nourishing food and a roof over our heads. We trust and we are grounded; anchored to the earth, our home.

The sacral chakra is below the navel, with the colour orange, like a sunset, and the element water. This is the seat of our our sensuality and creativity. We are grateful for having our senses and experiencing the sight, sound, touch, smell and taste. All that is wonderful to immerse ourselves, our senses inspire creativity and we flourish; even when flowing through the changing seasons of life.

The solar plexus chakra is just beneath the lower ribs, with the colour yellow and the element of fire. This is the seat of our courage, strength and personal power. Here, we recognise and are grateful for our unique strengths. With all humility, we allow our own sun to shine at full strength and make light for those around us.

The heart chakra is in the centre of the chest, with the colour green and the element of air – the very air that we breathe, the air that gives us life and the air that connects all of us…

Below is my little piece on the heart, as well as free 35-minute flow for you to try:

35-minute beginner/Level 1 flow

There, in the centre, is the connection between our humanity and our spirituality. Verdant like a new leaf in an emerald forest, love is reborn. Resonating unstruck; unhurt.

The cymbals never connect, yet a beautiful sound emanates.

And it is pure love.

The subtle intermingling of a desire for security, sensuality and self-belief flows into a heart made to fold into compassion, love and joy.

Like the air we breath and the oxygen in our veins… we are all of these elements – earth, water, fire – yet, through the inhale and exhale, tied to those higher dimensions of connection.

The freedom and courage to express what we feel; what we think. To speak our truth.

The wisdom to question our thoughts and how they shape what we feel; the insight to follow our gut. Does it feel right inside?

And the humility to explore a universe beyond our life and our world; a source of wisdom beyond our humanity.

A simple prayer for guidance.

#WordPrompt Green

(Many sources were studied over time – there is nothing new under the sun. However, this post was written from understanding, with no quotes or AI :-).